Ver 2004.09.15 By George F McQuary, Swiftracer.com
For information purposes only. No guarantee of accuracy. Not an employee of iRobot, merely a customer. Not responsible for warranty violation, injury, damages.
To proceed, you are doing so at your own risk; and, agree to the above disclaimer statement.
Please don't ask me to fix your roomba. :-)
Broken belt dance behavior:
Spins in a tight circle not moving one wheel when turned on.
Halfway through, stops abruptly as if hit a wall, reverses circle.
Goes forward and backwards a few times still in a circle, then
Gives up with an error song.
Use the to confirm wheels aren’t moving forward/back/wheel optical sensor for that wheel isn't flashing. If motor is spinning (you can hear it) but wheel isn’t, you’ve probably got a broken belt, a sixty cents parts replacement.
Each wheel has an optical sensor/light combo, and a fan-like optical blocker that moves as the wheel moves. The roomba senses on its own that the wheel is not moving despite the motor turning, and shuts itself off.
Remove the top cover using these screws:

See also http://www.10k.org/jake/mod/roomba/1disass.html to see which screws to remove to take off the top cover. You may also find these photos on cleaning the bumper optical sensor useful, even though we'll be dealing with the wheels instead here.
Then you'll want to unplug the cable connecting the top keypad to the motherboard (only goes in and out one way)
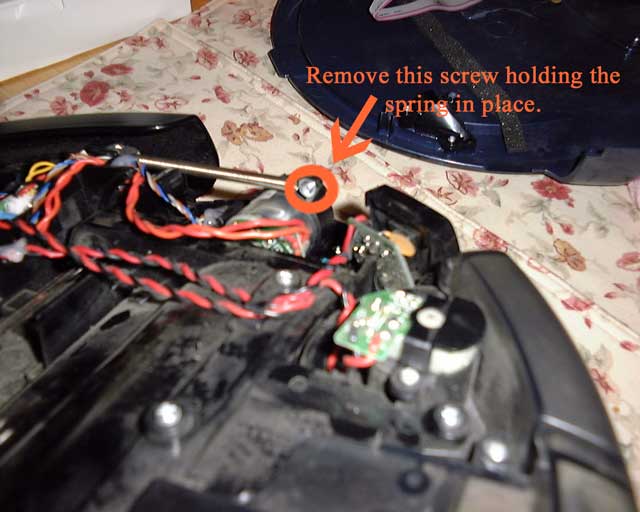
The spring at the top of the wheel assembly is held in place by a wide head screw. Remove this.
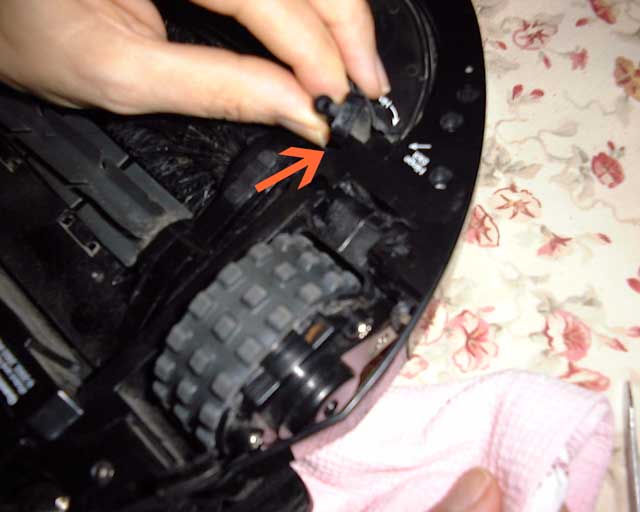
The wheel assembly is held in place by screws only accessible from the inside of the case. Look for one screw to either side of the wheel that goes into small plastic plate fitted into the bottom case. Unscrew these and set aside as well.
Now you have a choice. I prefer (and describe) wrestling out the wheel assembly entirely because it makes removing the belt cover much easier. Others have left the wheel assembly in the wheel slot, which means a more difficult belt cover removal, but not having to wrestle it in and out. You can find Larry Geller's description of the later here.
Free the wheel assembly so you can get full access to the belt cover. Be careful of the wires attached to the wheel housing and don't pull so hard as to break them. Pulling the wheel housing towards the dust bin seems to be the best, but I still had to gently wrestle with it to remove it. Between the motor and the circuit board it wedged into place in the slot. It's a tight fit, have patience, and if you find the trick of it, please let me know.
Dr. Cassis mentions "I found that the wheel [assembly] would not come out of the well because it was wedged by a small piece of plastic that contacts a switch and hits part of the frame to prevent the wheel from moving further out. My solution was to gently squeeze the frame toward the inside allowing clearance for the plastic piece."
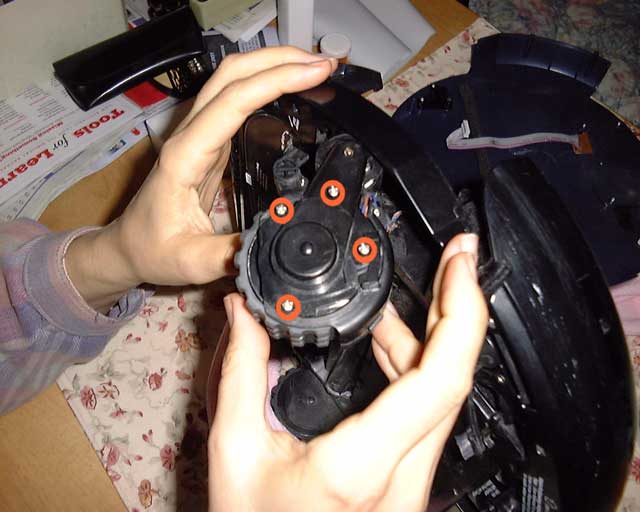
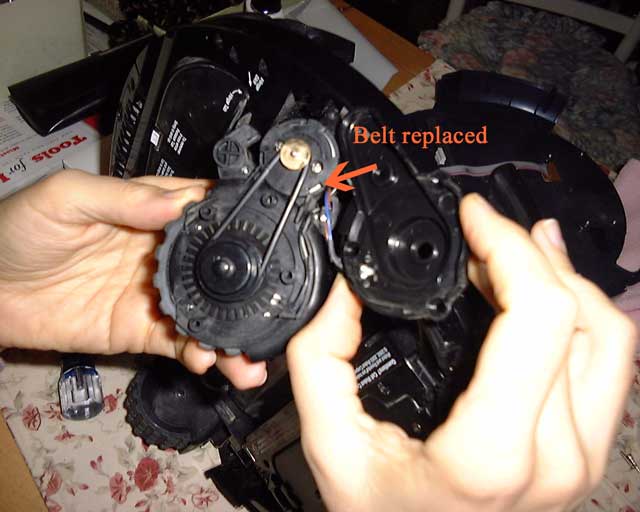
Remove the 4 side screws on the belt protector case. Either the belt will have slipped (may be able to replace it back, but don't be surprised if it slips again), or is broken altogether.
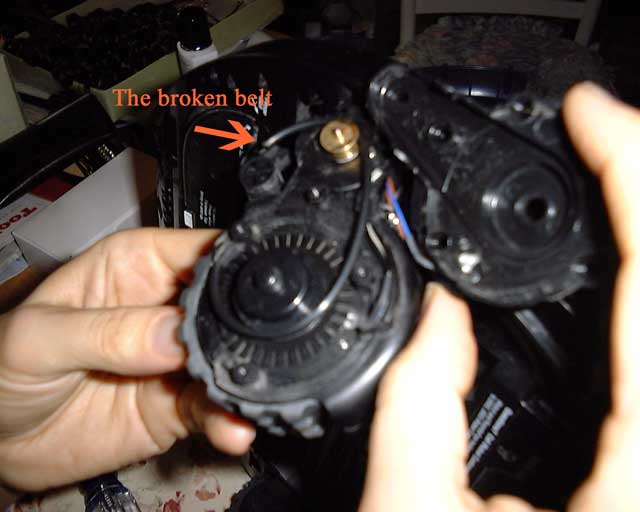
The “belt” as it is, is actually an O-ring you’ll find in a plumbing department at a hardware store (Autopart store's O-rings are too thick). Sometimes they are multiple O-rings in the same bin, so take along your broken belt to check the size of the new one you're buying The info:
1 5/8” inner diameter
1 13/16” outer diameter
3/32” body diameter
My local hardware store gives it stocking number OR130
Cost: $0.58-0.60 each.
I may have the light and light sensor labels switched in this photo, which doesn't effect the repair. The important point is light shines in on one side, is detected on the other, and the optical fan blades interrupt the light and cause the flashing in diagnostic mode 6 only when the wheel actually turns.
After the belt is replaced, be careful not to slice the optical sensor wires when replacing the belt protector case. Look at the other wheel if you're not sure how the wires should be routed again. Don't overtorque the screws back in, since they are self-tapping screws.
Wheel assembly replacement will be a bit of a struggle to pop into the body again. Have patience.
See also the articles: Roomba Diagnostic Songs, Roomba Discovery Diagnostics, Roomba Problems.
[Other contributors: Larry Geller, Dr. Cassis, Bob Gridley (correction on O-ring inner diameter to 1 5/8")]